How to connect a Steam Deck to a TV
It's not quite plug and play
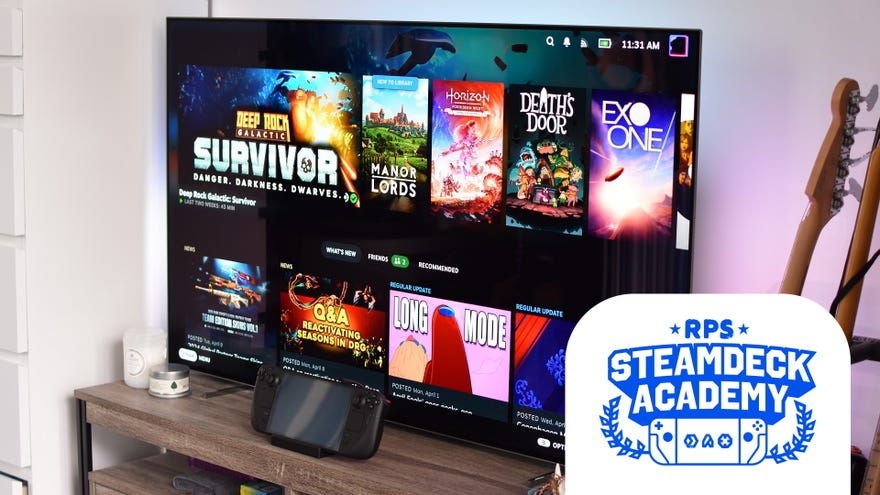
Even if connecting your Steam Deck to a TV takes the "portable" out of “portable PC,” big-screen play is yet another of the handheld’s many talents. As far as lounge-based gaming goes, it’s certainly preferable to hauling several kilos of desktop from your desk to your telly and hooking that up instead.
As for the particulars of marrying Deck and TV, Steam Remote Play veterans may immediately turn their thoughts to the Steam Link. This can indeed enable wireless beaming of your handheld-installed games onto the living room screen, but sadly, the Steam Link itself has been discontinued for years, and while it lived on as a smart TV app, this isn’t widely available either - especially after Samsung cut support for it in 2023. Nowadays, your best bet is to connect your Steam Deck to your TV using physical hardware, and this here guide will show you how.
Essentially, you can either employ a USB-C-to-HDMI adapter to directly connect to your TV, turning the handheld into a controller, or you can have it settle into a dedicated Steam Deck dock and let that handle the display output. Me? I prefer the latter, which delivers more of the laid-back, sofa-enveloped playing experience you’d get from a traditional console, but I’ll explain the ins and outs of both approaches further down. They’re also applicable, by the by, to connecting a Steam Deck to a smaller monitor, so take heed if you intend to press yours into service as a desktop PC as well.
Whatever kind of screen you’re dealing with, be forewarned: the picture that comes out of your connected Steam Deck might not look perfect on the first try. In my experience, teaming up with an external display usually requires a trip into the Deck’s settings for some visual fine-tuning. I’ll cover any potential changes you might need to make, though, so don’t worry too much. S’fine. Honest.
- How to connect a Steam Deck to a TV with an adapter
- How to connect a Steam Deck to a TV with a docking station
How to connect a Steam Deck to a TV with an adapter
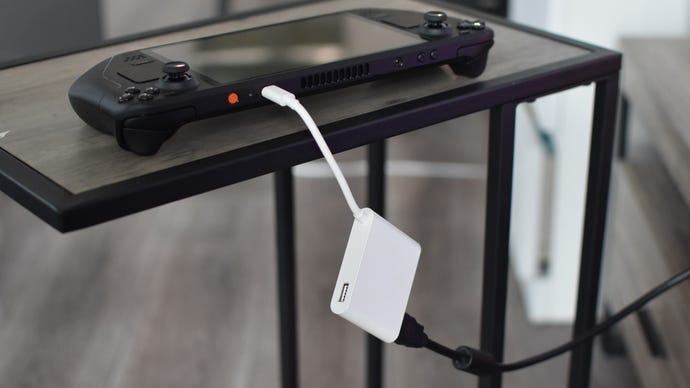
This is, technically, the simplest and most direct method for playing your Steam Deck on the telly: all you need is an HDMI cable (ideally HDMI 2.0-compliant) and an active (but not passive) USB-C-to-HDMI adapter. Once everything’s hooked up, you can just use the Steam Deck itself as a controller – no need to buy or even connect another gamepad, or attempt mouse and keyboarding on a settee.
Points for straightforwardness, then, though keep in mind that the HDMI cable and adapter will add some weight to the Deck, making it less comfortable to hold for long sessions. If, indeed, you can have one before running out of battery. The repurposed laptop adapter I’m using in these photos has a USB-C port for pass-through power delivery, but most USB-C-to-HDMI dongles do not, so there might be no way to keep your Deck charged as you play it. That’s not an issue with a full dock.
Still, this guide is to teach, not to preach. Want to use an adapter? Go for it, like this:
Step 1: Connect your HDMI cable to your TV at one end, and plug it into the USB-C adapter at the other end. Then, simply push the adapter into your Steam Deck’s USB-C port.
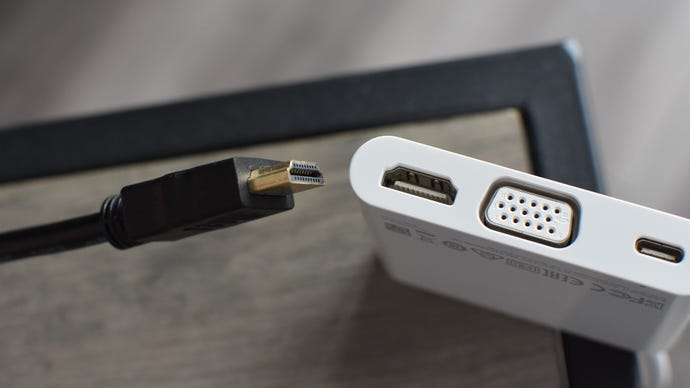
Step 2: Switch everything on, and using your TV remote, select the HDMI port you connected to as the active input. After a moment, your Steam Deck screen should appear mirrored on the TV.
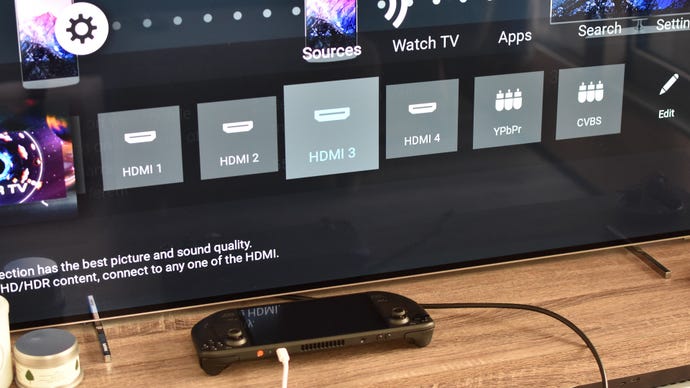
If you’ve got your Deck in its default Gaming Mode, its own display will turn black. Be not afraid! That’s totally normal, and should help with battery life if you've got got an adapter with a power-carrying USB-C port. If, on the other hand, the Deck was in Desktop Mode when you connected the TV, the screen will stay on.
Step 3: Press the Steam button on the Deck, go to the Settings menu, and open the Display submenu. Uncheck "Automatically Set Resolution" and select the option that matches your TV’s resolution – mostly likely either 1920x1080@60 or 3840x2160@60.
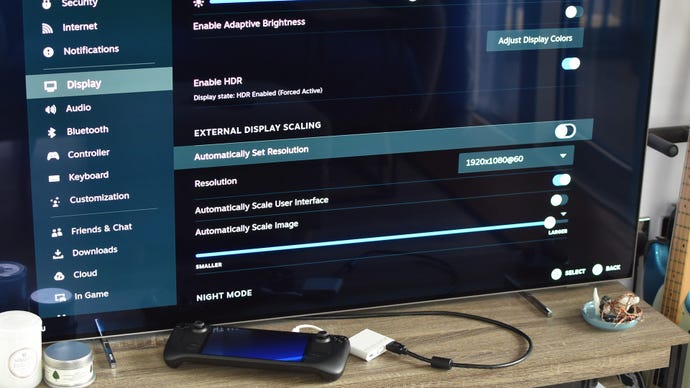
Why bother with this step? Firstly, it seems to fix an issue the Steam Deck has with external displays where game framerates are needlessly locked to 30fps. Secondly, it’s mainly just for the benefit of making the SteamOS UI look nice and sharp. While the Steam Deck actually running games at 4K is out of the question – even 1080p will be a stretch at best – you might as well have its menus and the like at native resolution, even if you have in-game resolutions at 720p or so.
Step 4: If the outputted image doesn’t fill your screen properly, stay in the Display menu, uncheck "Automatically Scale Image," and adjust the slider until the picture fits.
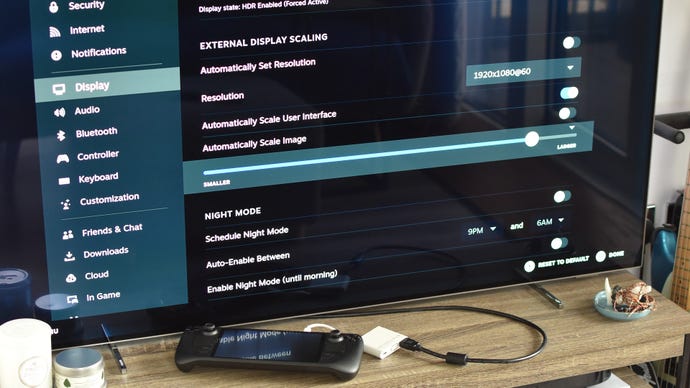
From there, you’re good to go.
How to connect a Steam Deck to a TV with a docking station
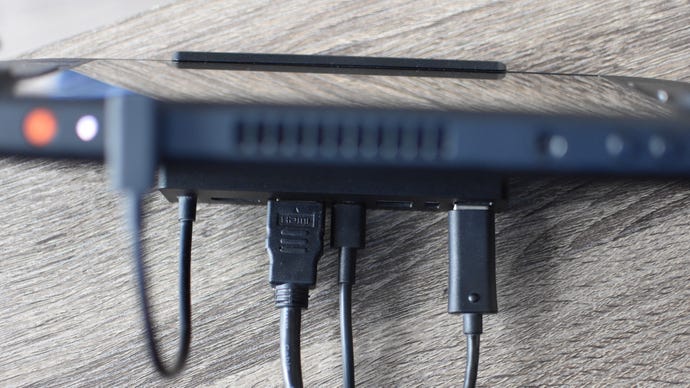
Steam Deck docks are in their element here. Although they preclude you using the Deck itself as a controller, their supply of USB ports mean you can switch to any gamepad, mouse, or keyboard you want, and battery life isn’t a concern as any Deck dock worth its solder will support pass-through power delivery. Just plug the handheld’s own USB-C charger into the back of the dock, and it’ll keep you topped up as you play.
There’s no need for any further adapters either, as docks typically include their own HDMI output. Some even have a DisplayPort, though living room TVs don’t share these nearly as often as desktop monitors do.
Step 1: Set up the Steam Deck in its dock, ideally with the Deck’s USB-C power supply plugged into the dock’s USB-C port. Connect any peripherals or gamepads you want to use, either via USB or to the Steam Deck via Bluetooth, then finally connect the dock to the TV via HDMI. This cable should ideally match the specification of the HDMI output on the dock, which is most likely HDMI 2.0.
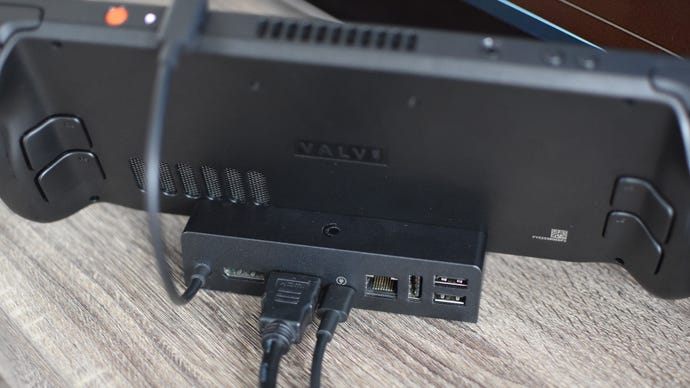
Step 2: Change your TV’s active input to the HDMI port that the dock is connected to. If you see static, try unplugging the power cable from the dock, waiting a few seconds, then plugging it back in. Either way, you should see the Steam Deck mirrored on the big screen.
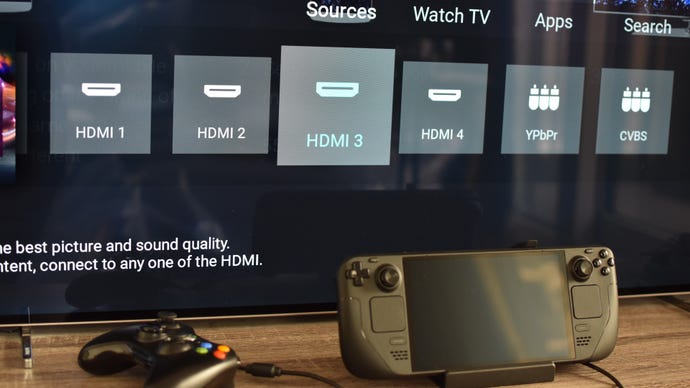
As with using a simple adapter, the Deck’s own screen will go black in Gaming Mode, or stay on in Desktop Mode.
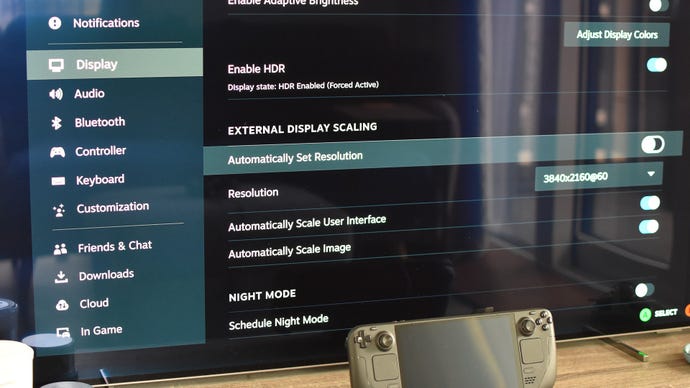
Step 3: Open the Steam menu and navigate to Settings, then Display. Also like with the adapter method, I recommend you uncheck "Automatically Set Resolution" and select either 1920x1080@60 or 3840x2160@60 instead. Again, this won’t force the poor Steam Deck into trying to run games at 4K or anything. It just makes SteamOS look nicer, while fixing the 30fps cap issue that the auto setting can suffer from.
Step 4: Check that the outputted image actually fits your TV screen. If it’s too big or small, uncheck, "Automatically Scale Image" and adjust the slider to get it fitting perfectly.
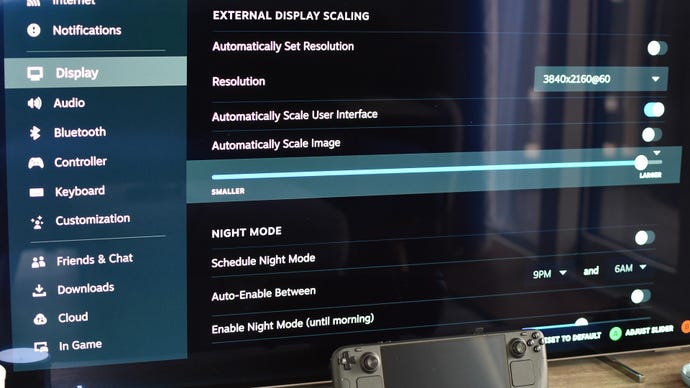
Aaaaaand you’re away, free to enjoy your Steam Deck on a screen several times the size of its own.
On that note, do remember the principles of pixel density, and that games that look decently sharp on a 7in display may not on something upwards of 40in. Those with intentionally simple and/or pixelly visuals – think Vampire Survivors or Signalis – work best, I find. Plush games that need a lot of help from upscalers just to hit 30fps, like Horizon Forbidden West, should probably stay confined to the smaller screen.
